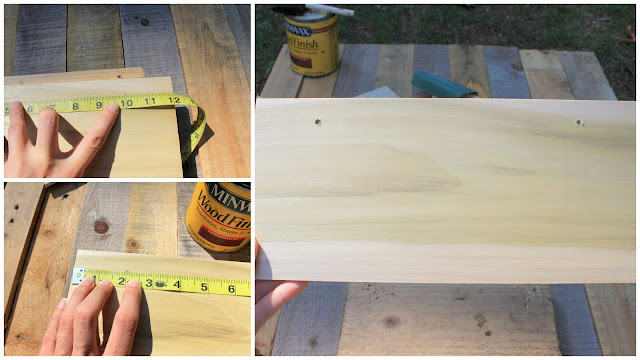
To get started I must note that the Poplar wood comes in both 2 foot(cost $2.91) and 4 foot lengths(cost $6.94) by 5.5 inches wide. I get my Poplar craft wood from Lowe's and Wayne cuts them to size(12 inch pieces) for me. I choose poplar wood because it is a harder wood. I have used pine in the past. It is much softer so it gets marked up/scraped much more than the poplar does. Seeing as we are going for a rustic look scratches are a good thing, but I have to ship these babies so I would like to see that they hold up well.
Once cut into 12 inch pieces I measure in two inches from both sides and make a small dot. This is where the drill, and the junk slab of wood comes in. Make sure to place the slab of wood under your poplar. You need something there to take the impact of the drill bit going through the poplar wood. I use a jute twine that is found at almost any hardware store. I make sure that my drill bit hole is just a bit larger than the twine. Adjust the size based on the twine or ribbon you will be using.
Next start rounding off the sides and corners of the wood. It gives the signs a softer look, and once again better for me to ship!
The next step is to take your sponge brush and dip it lightly into the red mahogany stain. Run it on the inside rim to get as much stain off as you can. It spreads out a lot with just a tiny bit. I go for the lighter more walnut-y 'washed' look. I recommend spreading it with the flat edge of the sponge pressed down and moved side to side. Less of a paintbrush stroke, more like a wipe.
Like so..
Once dry (left in the sun for a whole day does the trick-if the sun is not an option then a hairdryer would work). You will now need your jute twine(found at almost any hardware store), scissors and I use a 6mm Zig Posterman broad chisel tip waterproof white ink marker. I have used paint pens. They do NOT even come close to being as easy to use as these markers do.
Find a typeface you want to write in. I do a lot of screenshotting of fonts that I come across. I try to change them up, and make them uniquely mine. They are mostly just a guideline.
Cut two 3 foot pieces of twine. I make my twine adjustable so that they can be hung on any kind of chair, and re-bowed. "Mr." has a adjustable bow on the left, and "Mrs." has an adjustable bow on the right. See photo's for details on stringing the signs.
I hope I have inspired some of you to get to your nearest hardware store. If this is just an unbearable amount of work.. I do have the sets available in my shop for $30 each! Stop on by at Dream State's Etsy Shop and see what signs I have available right now. They are always changing!


Thank you so much for posting this. I'm planning on making these for my wedding!!! Where did you find the waterproof ink pen? I have made some rustic signs before but the pens that I used all bled and I absolutely don't want that to happen this time!! Thanks so much!
ReplyDeleteYou have shared amazing idea here for rustic design signs. I am going to try this for my wedding day. In next month it’s my marriage at New York wedding venues. I am sure everyone will love this rustic style Mr and Mrs Design.
ReplyDeleteWhats the name of the White markers that you use for wood?
ReplyDeleteUseful Post! Hire wooden chair
ReplyDeleteevent chair
chiavari chair
led bar
vintage chair